How to set up your Linux GNOME environment for work to maximize productivity
Introduction
Linux is a very popular choice among developers when it comes to operating systems. It offers a broad spectrum of distributions, each tailored to specific needs. Yet they all share many common traits, among them - unparalleled customization. Linux empowers users to fine-tune every detail, optimizing their experience.
This article delves into workspace organization, shortcut configuration, system startup, and more. Some adjustments are straightforward, while others require you to dig deeper and employ external tools. The content covered here will guide you to discover what suits you best and how to set it all up. The guide focuses on the GNOME desktop environment, but the principles highlighted here are also applicable to other popular choices (with different tools used for setting them up). Whether you’re a seasoned Linux veteran or a newcomer, the tips shared should help you streamline your workflow and save time, allowing you to focus on the operative part of your work.
Why Having a Comfortable Setup Is Important
An ergonomic and efficient workstation setup is crucial for work, especially if you are a programmer. In the world of coding, you often find yourself having many programs open at once, or even multiple instances of the same program. Manually starting numerous applications not only takes time, but can also lead to performance bottlenecks when resource-intensive programs are involved. During work, you often have to switch between applications. Scrolling through them and finding the right one can easily become tedious and hinder your productivity. Some might say that having a taskbar or a dock with all the application icons listed is enough, but that means you will have to click around a lot, and that’s much slower compared to using keyboard shortcuts, so that does not help.
In cases like that, a well-optimized desktop environment transcends mere convenience; it becomes a necessity. It liberates you from the navigation tediousness, so that coding and problem-solving can retain your primary focus.
Choosing a Linux Distribution
From a workflow perspective, the choice of a Linux distribution is not a pivotal decision. Most of them offer a range of desktop environments (DEs), with GNOME or KDE either as the default or as secondary options. These stand out as the two most feature-rich DEs that are widely available. While both were criticized in the past for their performance usage, they have significantly improved in that regard over the years. Compared to traditionally lightweight DEs, they offer more features and a more modern design with smooth animations. Their default configurations are sufficient for everyday tasks without requiring a manual setup. Once we get to advanced configurations, that’s when we need to tweak things ourselves and where the ease of use comes in handy. While window managers such as i3 or bspwm require manual configuration of text files, you can change most settings in GNOME or KDE using the provided GUI and if needed a few external tools.
In summary, when selecting a distribution, focus on other critical factors, such as package deployment preferences (package manager, repositories, stable or rolling release deployments), adaptation to specific purposes, ease of use, etc. As long as the distribution supports GNOME or KDE, the principles discussed here apply, allowing you to enhance your productivity.
Typical Types of Software Used
Whether you’re a programmer or of some other profession that uses a Linux desktop, chances are you rely on a set of software tools that you use every day, plus a few others that you open from time to time. In this chapter we will try to summarize that and come up with a logical grouping of them that we will use as a reference for our setup.
- As a programmer, your bread and butter is a code editor. Nothing strange here. If you’re using two monitors, it’s safe to assume that the code editor will always be active on one of them. If you’re using a single monitor, then it’s preferable to have a separate workspace just for the editor.
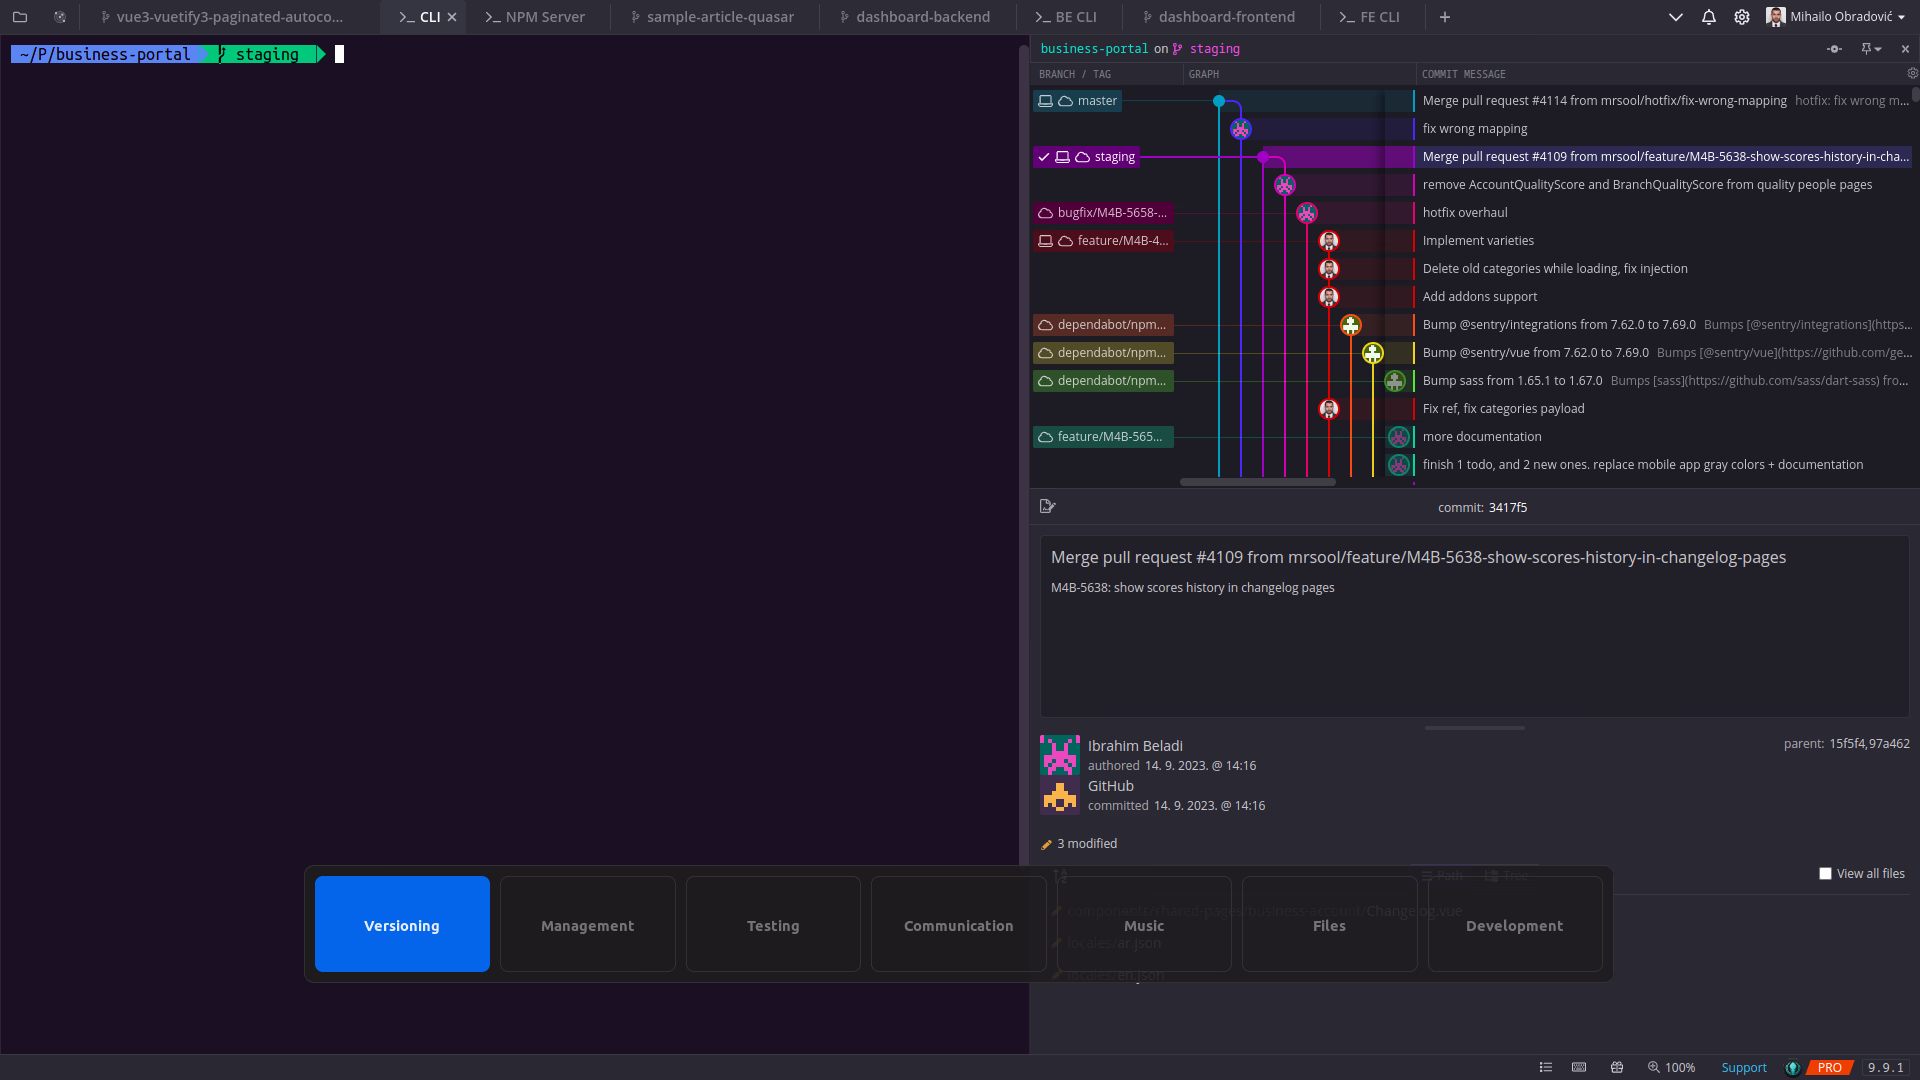
- While many editors offer built-in terminal emulators, most people opt for separate terminal instances. One will often be used for version control, and another for running a local build. A third one may be used for tests if your computer can handle all of that together. Additionally, some people might prefer to use a dedicated version control application like GitKraken or Sourcetree. Since all of these serve a similar purpose and not all of them need to be full screen, it makes sense to have them all on a single workspace.
- Programmer or not, you will need a web browser to access all the web applications you need for everyday work. It’s used all the time for various different purposes, so it makes sense to keep it separate from everything else.
- Whatever you’re developing, it’s optimal to have the preview of your work at hand all the time. Whether it is another browser, an emulator, a desktop app or something else, this is another thing most people would prefer to have separate.
- Collaborative work with many people, especially if you aren’t all in the same location, requires specialized team communication apps like Slack or Discord. In addition to that, you might prefer to have a desktop client for one of the commonly used mobile apps such as Telegram. Since you won’t be using all of those at the same time, they can be in the same workspace.
- Other apps: a file manager and other tools that you might not use all the time but it makes sense to keep them separated from the rest so as to not interfere with your usual work.
By arranging these thoughtfully, you’ll tailor the desktop environment to your needs and hopefully avoid situations in which you have to search through windows to find the one that you need at the moment.
Prerequisites and Basic Workspace Setup
From what we’ve summarized in the previous chapter, we will need between four and seven workspaces to organize everything for our everyday work. Now it’s time to get to the implementation. We can begin with setting a fixed number of workspaces. Go to Settings -> Multitasking. Make sure you’re using a fixed number, and set it to what you desire.
Next, we'll need to install additional tools to tweak settings that aren't available in GNOME's built-in Settings app.
- GNOME Shell Integration: Easy management of GNOME extensions through the browser
- GNOME Browser Connector: Required system package
- GNOME Tweaks: Unlock hidden GNOME settings
- (Optional if using only four workspaces, but still recommended) Dconf Editor: Adjust shortcuts that aren't customizable through the Settings app.
- (Optional) Dash to Dock: If you prefer to have a dock instead of or in addition to a taskbar.
- To make sure Dash to Dock shortcuts don't interfere with our custom shortcuts: Settings -> Behavior -> Use keyboard shortcuts to activate apps -> Turn off.
To install these packages, you can do the following:
- GNOME Shell Integration: Visit the browser extension link for Chromium-based or Firefox-based browsers.
- GNOME Browser Connector:
- Arch-based:
sudo pacman -S gnome-browser-connector - Debian-based:
sudo apt install chrome-gnome-shell - Fedora-based:
sudo dnf install gnome-browser-connector
- Arch-based:
- GNOME Tweaks:
- Arch-based:
sudo pacman -S gnome-tweaks - Debian-based:
sudo apt install gnome-tweaks - Fedora-based:
sudo dnf install gnome-tweaks
- Arch-based:
- DConf Editor:
- Arch-based:
sudo pacman -S dconf-editor - Debian-based:
sudo apt install dconf-editor - Fedora-based:
sudo dnf install dconf-editor
- Arch-based:
- Dash to Dock: Visit the GNOME extension link and install using the newly added browser extension.
Binding Applications to Workspaces
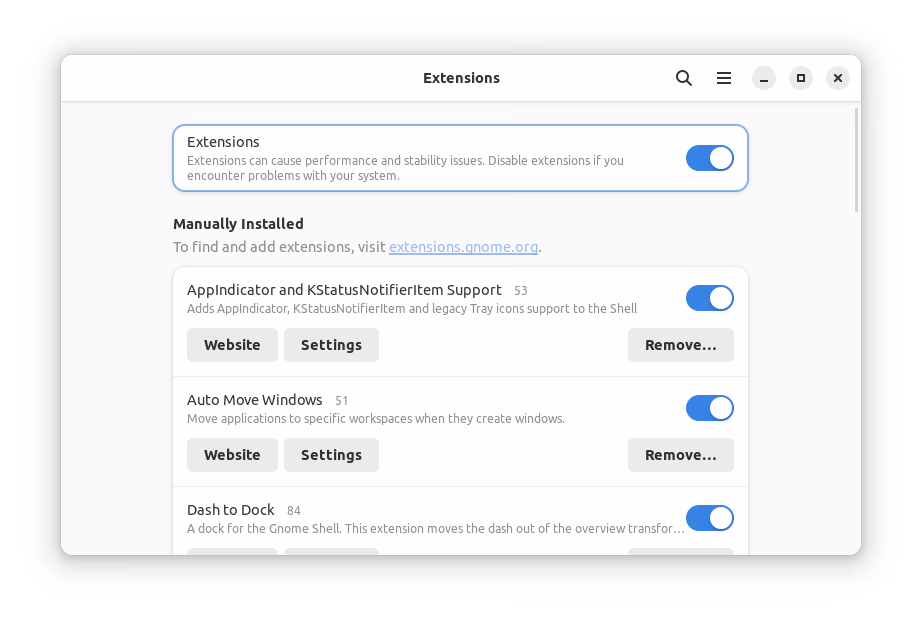
Locking applications to specific workspaces is the next step in optimizing our productivity. We already discussed why it's useful to have separate workspaces. Now we want all of this to be done automatically without having to do the moving ourselves. Auto Move Windows is a GNOME extension that can help us do this with minimal effort. The installation is a breeze, just like any other GNOME extension, as we explained in the previous chapter.
Once it’s installed, just open its settings, either from the browser or from the Application Menu -> Extensions -> Auto Move Windows. Simply add the applications you want to bind and assign the right workspace for each of them. From now on, whenever you launch an instance of one of those applications, it will automatically be placed in its designated workspace.
Configuring Startup Applications
We already significantly reduced the effort needed to build a work environment when you start your machine, but it can still be improved further. Assuming you have desktop or dock shortcuts for all of your favorite applications, you just need to click them and they will open where they should. But there's no need to do that, because we can automate this as well.
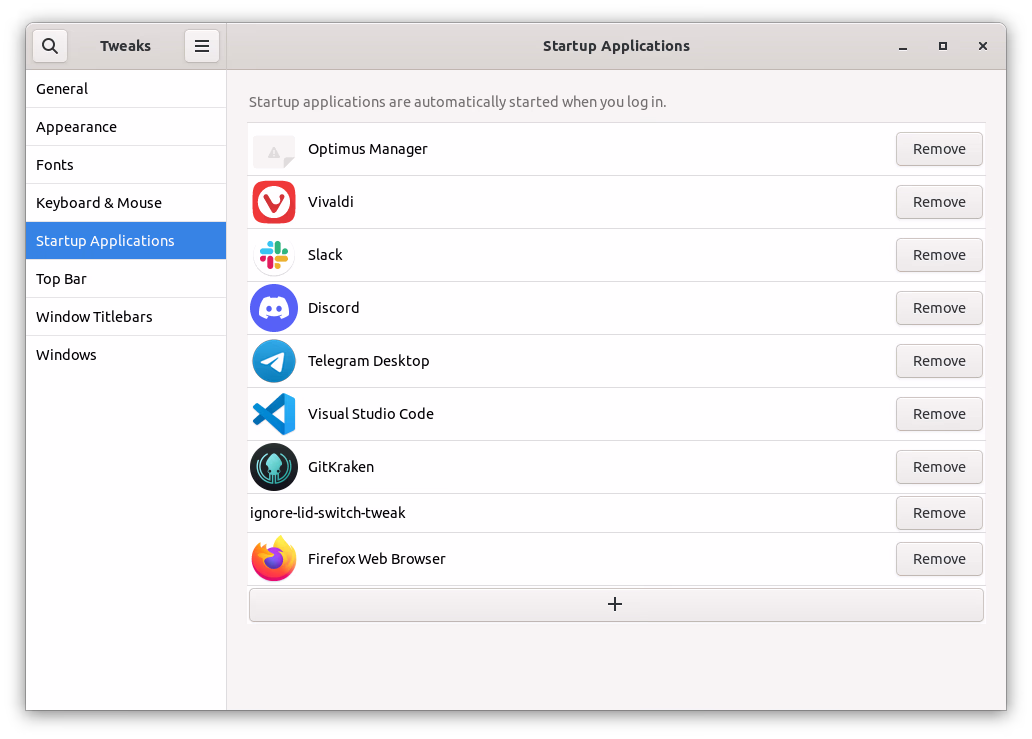
Open GNOME Tweaks and go to Startup Applications. Here you simply need to add all the programs you want to have open when your machine boots. That's it!
Note that some applications may have internal settings that can be adjusted either through the application's GUI or using systemctl enable app_service_name/systemctl disable app_service_name. If you encounter any conflicts, be sure to check those settings.
(Optional) Optimizing Keyboard Shortcuts
In previous chapters, we covered all of the most important steps to optimize your work environment. That should already make a huge difference if you’ve never done anything like this before. Now we get to personal preferences.
If you like or are already used to the default GNOME shortcuts, you can skip this chapter (or parts of it). What I will continue with is rather subjective and may or may not suit you. I encourage you to take a look anyway, and if you prefer other shortcuts you can still use the same steps to customize them.
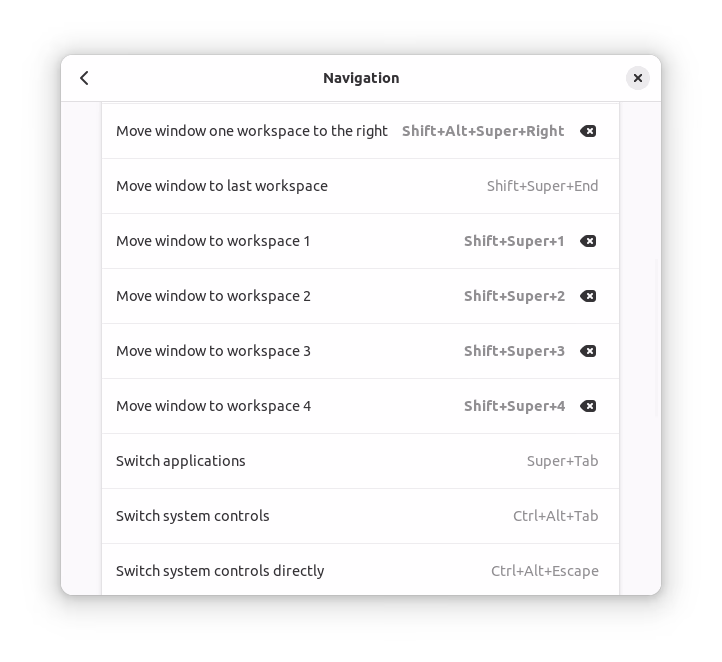
To customize shortcuts, go to Settings -> Keyboard -> View and Customize Shortcuts. To begin, I like to change the shortcuts for switching workspaces and moving windows between them:
Super+1: Switch to workspace 1Super+2: Switch to workspace 2Super+3: Switch to workspace 3Super+4: Switch to workspace 4Shift+Super+1: Move window to workspace 1Shift+Super+2: Move window to workspace 2Shift+Super+3: Move window to workspace 3Shift+Super+4: Move window to workspace 4
Note: Depending on distribution, your system may have predefined shortcuts for switching to application 1, 2, etc. with Super+1, Super+2, etc. Make sure you disable those.
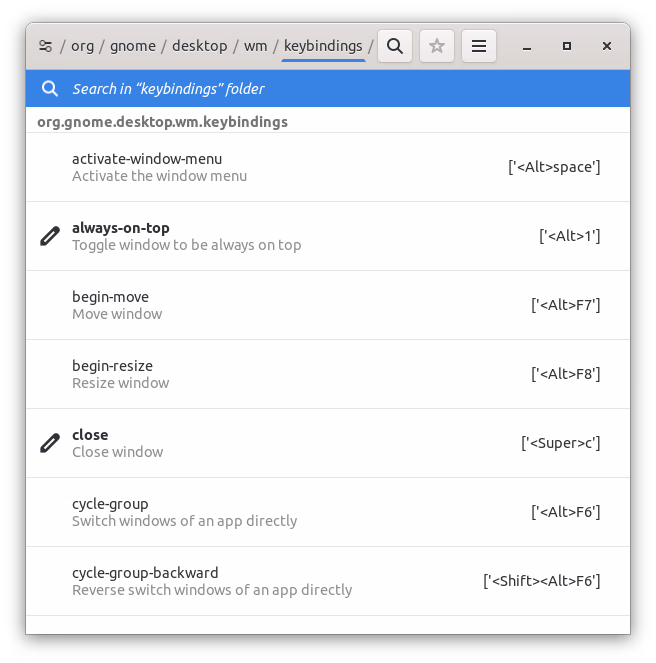
In case you use more than four workspaces, you need to change the rest using DConf Editor. That's because those options aren't available in the Settings app. To change them, open the editor, go to org/gnome/desktop/wm/keybindings, and change the following:
- Switch to workspace 5
['<Super>5'] - Switch to workspace 6
['<Super>6'] - Move window to workspace 5
['<Shift><Super>5'] - Move window to workspace 6
['<Shift><Super>6']
The same note from the previous paragraph applies.
If you already have DConf Editor open, it's a good time to make a few more modifications. Some of these settings are already editable from the Settings app, but here you have all available options listed. I like to have buttons for quick closing/toggling full screen mode:
Super+X: Toggle fullscreen modeSuper+C: Close window
Another nice thing to have is quick switching of active windows. This is useful when you have multiple maximized windows open. I like to limit this to a single workspace, but you can leave it to all windows mode if you prefer. My settings are:
- Switch windows of an application: Disabled
Super+Z: Switch windows directly
Finally, I like to have two additional controls that I don't use every day but are still useful in the right circumstances:
Shift+Super+A: Toggle window presence on all workspaces or just oneAlt+1: Toggle window always on top status
That completes my preferred setup. It allows me to do all of my daily activities using shortcuts in a fast and efficient way. I encourage you to try things out yourself, but highly recommend that you backup your files, because it's easy to mess things up with DConf Editor.
(Optional) Bonus Supplementary Tips
Finally, I would like to share a few bonus tips. Some aren't closely related to previous chapters but still can provide small productivity boosts.
Focus fix for certain apps: Certain applications, such as GNOME files, may not automatically receive focus when started in another workspace. This might bother you because it's inconsistent with most apps' behavior. To rectify it, you can install the GNOME extension called Grand Theft Focus. It also disables the annoying "Window is ready" notification that triggers in these cases.
Workspace Switcher Manager: If you like to have detailed, customizable indicators when switching workspaces, instead of just showing dots, you can install the Workspace Switcher Manager extension. Unfortunately, at the time of writing this, the author has yet to update the extension on the official GNOME Extensions website, so you have to install the latest version manually. To do that, follow the GitHub repo readme from the provided link.
Handling the coding workspace for both single and double monitor setups: In my usual office work, I use a double monitor setup. But sometimes I step out of the office and use just my laptop without any peripherals. In those cases, I use a separate workspace controlled with the tilde key (~). When in office, my editor is fixed on the secondary display and it doesn't switch with the workspace. When out of office, I just move it to a separate workspace. To set the same settings I use, make sure that "Workspaces on primary display only" option is set in Settings -> Multitasking -> Multi-Monitor. Alternatively, you can just set the editor to occupy all workspaces using the shortcut we created earlier. Additionally, set these shortcuts for workspace 7 (or whatever your next number is) using DConf Editor:
- Switch to workspace 7
['<Super>asciitilde'] - Move window to workspace 7
['<Shift><Super>asciitilde']
Focus on hover: I like to have focus following my mouse when I work. This is very useful for double monitor setups or when you have multiple windows side-by-side. If you prefer this or would like to try it out, you can open GNOME Tweaks, go to Windows and then change Window Focus to Focus on Hover.
Tray icons: If you want to re-enable legacy tray icons support, you can install the AppIndicator and KStatusNotifierItem Support extension. I like this because it shows notification dots for some apps without me having to hover over the dock.
Overview and Conclusion
We went over numerous settings and configurations with the aim to produce a smooth experience requiring minimal effort to navigate through. This enables us to focus on work above all else and reduce tiresome manual clicking and window shuffling. While we did cover a lot of ground, a lot more is still there for you to explore. While the time savings might seem minimal on a daily basis, the cumulative benefits become strikingly evident over time. On the other hand, don’t spend too much time going through all the settings. It’s best that you create a base setup, and then improve upon it over time, as you gain experience.
Whether you're a seasoned Linux user or just starting, remember that your digital workspace is a canvas, and you're the artist. Tailoring it to your needs enhances your efficiency and fosters a seamless, distraction-free workflow. Going to work in the morning, pressing the power button, and watching the “magic” unfold while you unpack your things feels much more satisfying than having to do all that plus open many different apps and move them around. Same is the case when you’re out of office and clients call you because of some urgent bug that needs fixing. It’s all so much quicker when you can immediately start.
As you move forward, may your coding and daily tasks find new expression, unrestricted and inspired by the environment you've crafted.